Creating servers in Pterodactyl
Please note:
|
This guide will go over how to create servers on Pterodactyl.
Eggs
An egg is a file which tells Pterodactyl how to install, launch, and manage whatever application the egg is advertising to be installable. It gives Pterodactyl the commands necessary to download and setup the server files automatically. It also sets what configuration options are available to server operators.[1]
As all games are different not all egg installations will be the same. Some degree of basic server and computer literacy will be necessary. This guide will aim to be as helpful as possible in spite of this.
The benefit of an egg is that, so long as it has been added to the list of eggs on the panel, EDC can terminate and boot up the relevant software on demand.
Step 0: Checking if we have the egg
The first thing we want to do is see if we currently have the egg or not.
- Log into the panel at https://edcgaming.org.
- Click the cog icon to the left of the colored smiley face to access the administrative section of Pterodactyl.

The Pterodactyl panel button to get to the administrative section. - Click the
Nestsbutton on the following page.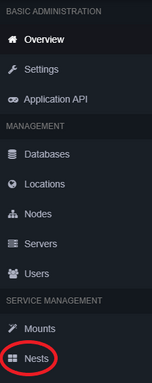
The Pterodactyl panel nests button in the administrative section.
You will be greeted with the following list (or similar looking list).

The term nest is fairly self-explanatory. Click into the nests and see if an egg for the software you want to spin up is present.
Review the table below for what you should do now.
| Desired egg IS present | Desired egg is NOT present |
|---|---|
| Skip to Step 2: Spin up server | Continue to Step 1: Finding and installing an egg |
Step 1: Finding and installing an egg
Eggs found in locations not documented below should be sanity checked by an experienced systems operator prior to installation. Experienced operators include Sirdog, Sushiloid, and SierraKomodo. |
Finding the egg
The following locations are commonly used to find eggs:
- https://pelican-eggs.github.io/pterodactyl/ (Option 1)
For the sake of this guide, let's suppose we wish to spin up a Mordhau server. On the Option 1 list, we find that Mordhau's egg is said to be located at a very long URL. Going to this URL presents a raw page with text. You are viewing a JSON file. The entirety of this page's contents should be saved to your computer in some fashion. The advised way is to right click on the page and select Save as.
Installing the egg
- Log into the panel at https://edcgaming.org.
- Click the cog icon to the left of the colored smiley face to access the administrative section of Pterodactyl.
The Pterodactyl panel button to get to the administrative section. - Click the
Nestsbutton on the following page.The Pterodactyl panel nests button in the administrative section. - You will be greeted with the following list (or similar looking list). Click
Import Egg.
List of Pterodactyl egg nests. - You will be shown a confirmation prompt. In this prompt, select the relevant JSON file, and ensure to set the nest to
Non-Default Games.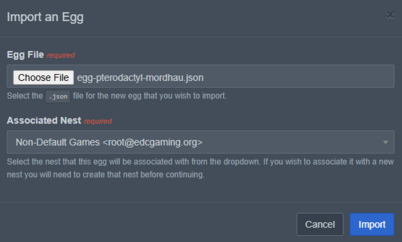
Pterodactyl egg importing prompt. - Click
Import. - You should see a new page with a lot of information on it and a green prompt saying the import was successful.
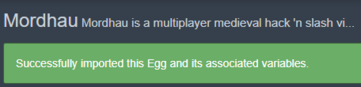
Pterodactyl successful egg import notification.


If you know what you are doing, or feel confident in your server literacy, you can tinker on this page. Otherwise, you should be able to safely navigate away.
Step 2: Spin up server
- Click the cog icon to the left of the colored smiley face to access the administrative section of Pterodactyl.
The Pterodactyl panel button to get to the administrative section. - Click the
Serversbutton on the following page.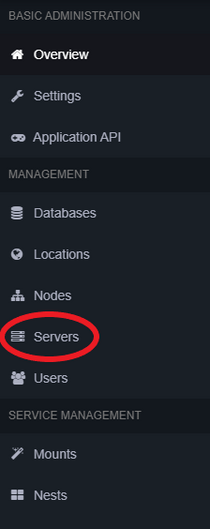
The Pterodactyl panel servers button in the administrative section. - Near the top right of the server list, click
Create New.
From here, you are going to see a considerable form requesting a lot of information from you. Review the table below for assistance.
| Field | Instructions |
|---|---|
| Server Name | |
| Server Owner | |
| Server Description | |
| Node | |
| Default Allocation | |
| Additional Allocation(s) | |
| Database Limit | |
| Allocation Limit | |
| Backup Limit | |
| CPU Limit | |
| CPU Pinning | |
| Memory | |
| Swap | |
| Disk Space | |
| Block IO Weight | |
| Enable OOM Killer | |
| Nest | |
| Egg | |
| Skip Egg Install Script | |
| Docker Image |
Remaining options on this form are determined by the egg. This inherently makes it impossible to provide further assistance here. Seek help from other experienced operators and search online.
When all options have been set, click Create Server.
Footnotes
- ↑ For example, for the Arma server, it's egg is configured to give operators an option in the panel to change the server's active modlist. The egg maps this created option to the appropriate line on Arma's
server.cfgfile.